Hardboard siding replacement
Maintaining your home’s exterior is critical to not only the beauty but the health of your home, not to mention preserving its value. It is what keeps the outside out. The exterior components include the roof, siding, windows, and doors.
You’ve heard it said you can’t/shouldn't judge a book by its cover? That is just what potential buyers, inspectors, and even insurance companies do whenever they look at your home's exterior. Peeling paint leads to water damage that can cause you to have to replace your siding and in some cases even allow water to intrude on your home's wall and attic spaces.
That is what caused us to step off the farm to help a friend. JB was selling his home in Eagle, Idaho.
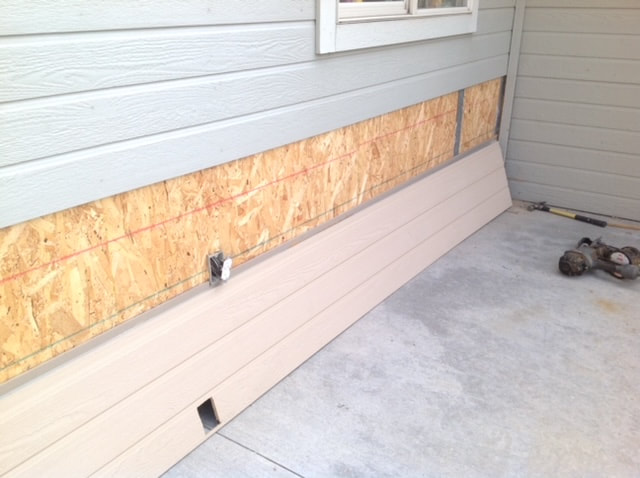
His home had Weyerhaeuser hardboard siding installed in the early to mid 1990's. This type of siding is made up of pressed wood (sawdust and resin) that has a paper type coating with wood grain embossed onto it. This siding is 7/16” thick 16” high by 16’ long covering a little over 21 square feet in one piece. Contractors like it because it goes up fast and paints up nicely. The top of the siding is thin, and the bottom is a half lap joint to allow for overlap and to still lay flat against the homes exterior sheathing. From the street, the look is intended to mimic a true lap siding. There have been several makers of this type of siding and several have discontinued their manufacturing of this line of products. In addition to Weyerhaeuser, Masonite, Georgia Pacific, and ABTCO are three that come to mind.
The Top 3 causes of damage include:
1) The backside of this half lap does not get primed and the painter cannot coat it once it's installed (making is susceptible to water damage)
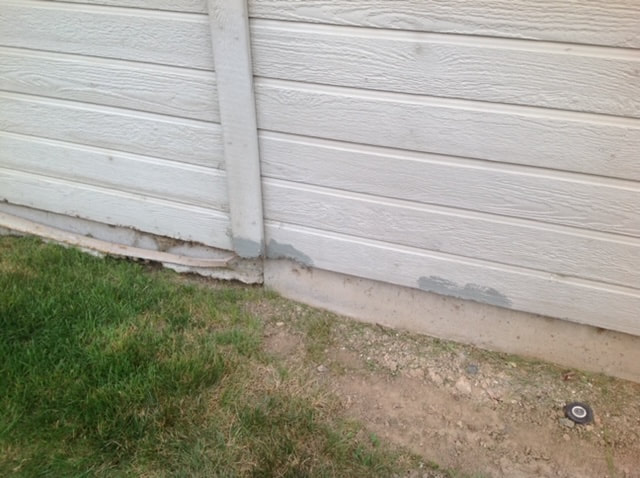
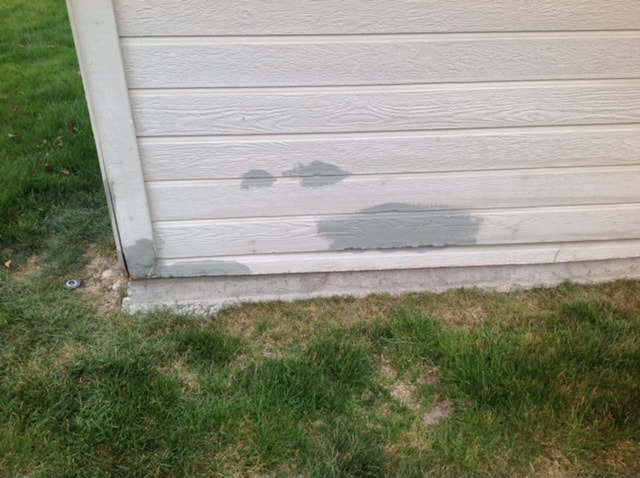
2) People plant grass right up to their foundation stem wall and install inground sprinklers up against the house. When the sprinklers are on, the water is atomized, and a slight breeze can direct the water underneath the lap to the exposed siding. As you can imagine, pressed wood swells, delaminates, and disintegrates when exposed to moisture on an area that has not been properly protected with primer and paint.
3) We mentioned the grass right? Well, with grass comes damage from lawn mower wheels and weed whacker string.
In most cases the only factory primer on this siding is on the front. Rarely, will you see a proper installation where all the manufacturer’s instructions are followed especially the first course that meets the foundation stem wall.
The often ignored installations call for the half lap portion to be removed prior to installation.
Here is where things go south due to a combination of factors.
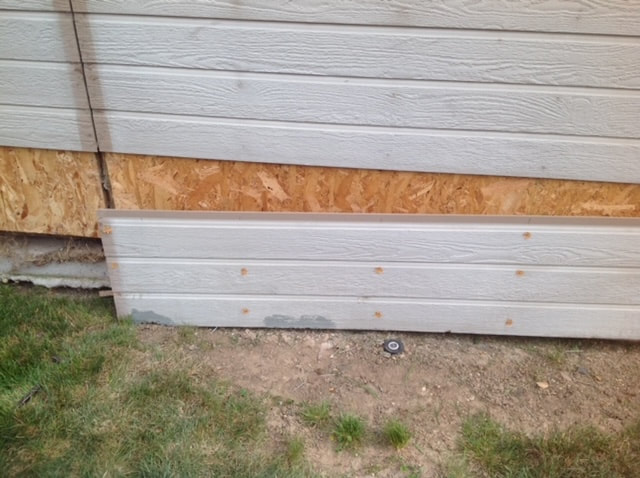
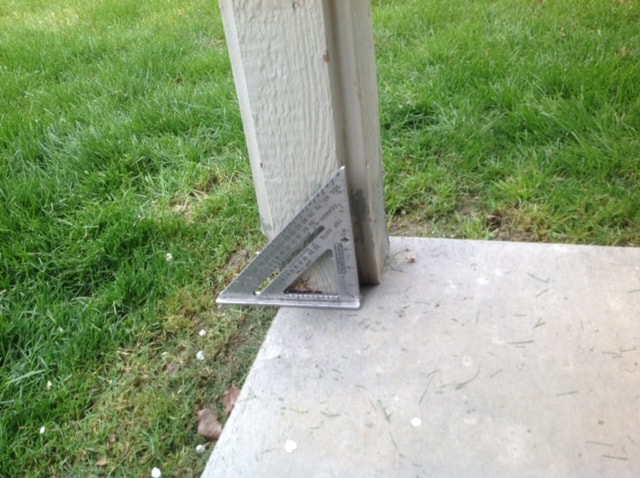
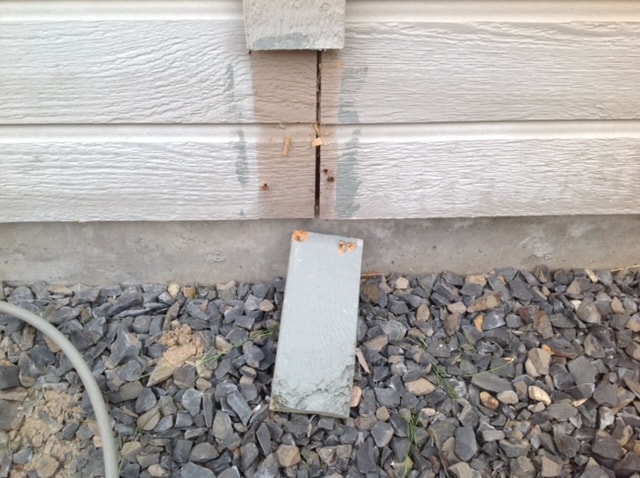
This thin portion overhangs the wall sheathing leaving it unsupported and the fact that it is maybe 3/16 “ thick makes is susceptible to breakage by lawn mower wheels or even a ground ball hit by the kids. Upon initial installation the bottom ¾” should have been removed (see pic to right and circle). When this doesn't occur (and it seldom does) it creates a perfect storm that is sure to wreak havoc with the siding.
Water runoff from an un-guttered roof eave or a lawn sprinkler too close to the foundation can allow atomized water drops to be swept up by the wind and contact the unprimed/unpainted portion of the siding. With this water exposure the siding’s fate is sealed.
A couple tips to avoid the issue:
1. Install rain gutters on all horizontal eaves on your home. Place extensions on your down spouts or use splash blocks to keep water away from your foundation.
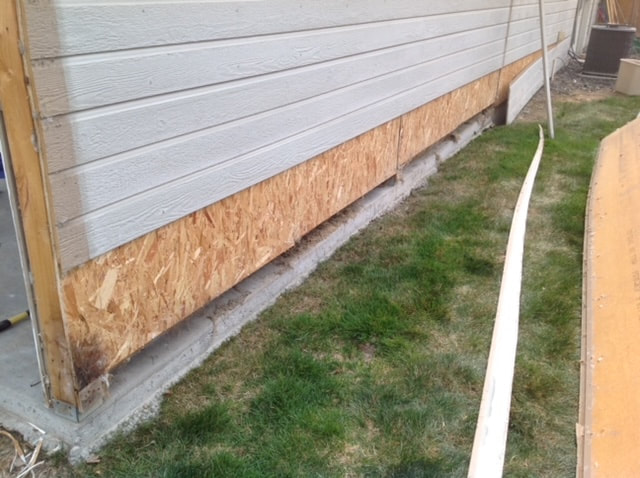
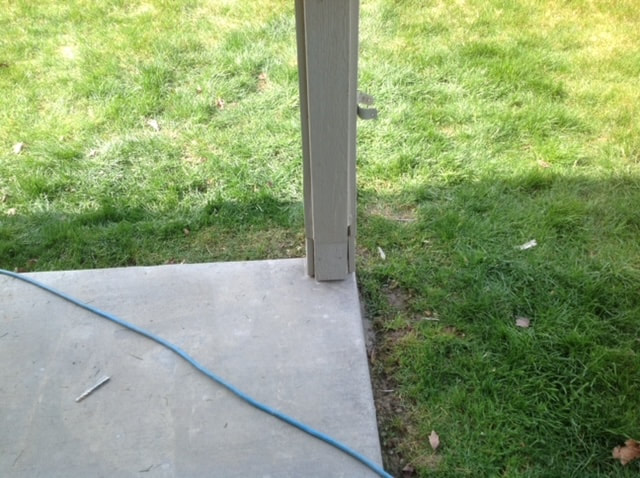
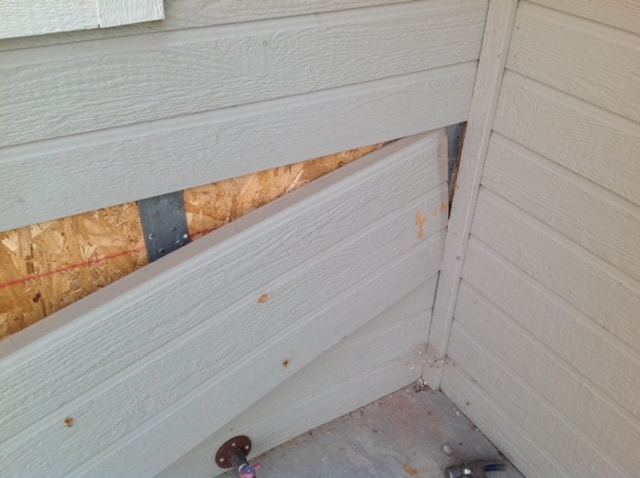
At JB’s home we needed to replace the bottom course of siding and even some of the 1x4’s that act as a batten covering the seams. You may notice that some of the scenes deciding is not butted tight to the next piece this is actually the proper way to install it as these 16-foot-long pieces do expand in contract with temperature and humidity swings. Several manufacturers have told me that they like the environment at the high desert of the intermountain West brings because of the lack of humidity this sighting certainly has more issues in areas like Seattle or in the Southeast where humidity levels are higher.
With this siding paint preparation is also critical. Any nails that are overdriven that break the surface of the siding with their head leaving an over sunk nail needs to be caulked. The trim will have exposed seams where a vertical one by four meets the one by two Frieze board at the soffit and wear a one by six or one by 8 piece of trim is used, and the fascia is butted together these scenes also need to be treated with a good quality caulking have.
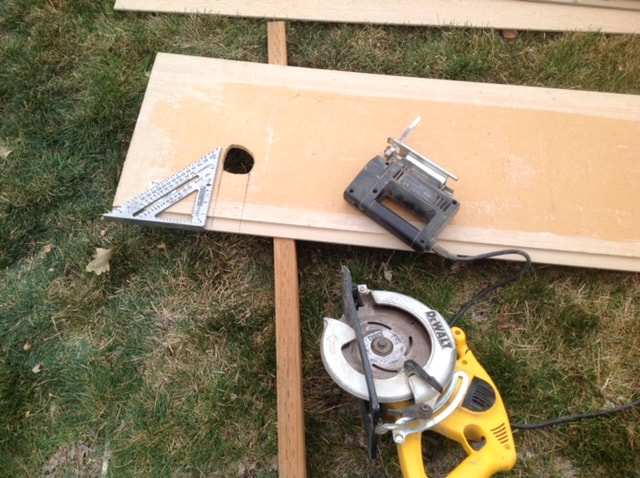
The tools we needed for this job are as follows:
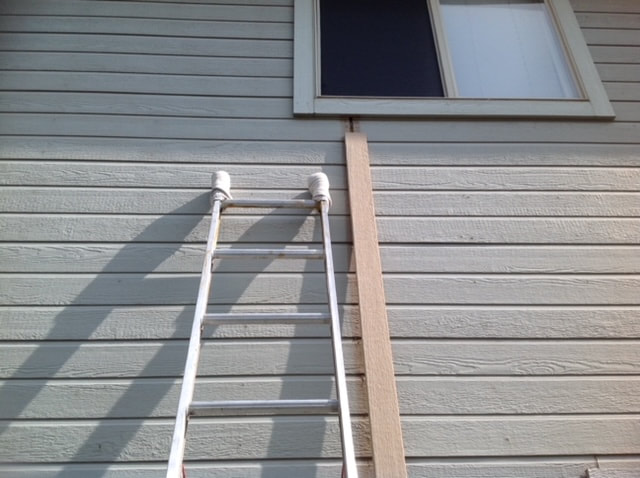
A skillsaw, a speed square, an air compressor, hose, pneumatic nail gun with full roundhead (As opposed to clip head) galvanized nails no larger than 8D in length. Specific siding nails come in 7D galvanized and are ring shanked. A flat prybar, a claw nail puller, a smooth faced hammer, and a chalk line.
I've included some pictures in this post so you could see the work in action.
If you lack basic carpentry skills and do not own the tools, you would be best served by hiring this part out. To find quality tradespeople in your location, go talk to the lumberyards where these products are sold and ask for references. Hopefully this post it helps you avoid problems in the future and gives you an understanding of the work that needs to be done around your farm.
You’ve heard it said you can’t/shouldn't judge a book by its cover? That is just what potential buyers, inspectors, and even insurance companies do whenever they look at your home's exterior. Peeling paint leads to water damage that can cause you to have to replace your siding and in some cases even allow water to intrude on your home's wall and attic spaces.
That is what caused us to step off the farm to help a friend. JB was selling his home in Eagle, Idaho.
His home had Weyerhaeuser hardboard siding installed in the early to mid 1990's. This type of siding is made up of pressed wood (sawdust and resin) that has a paper type coating with wood grain embossed onto it. This siding is 7/16” thick 16” high by 16’ long covering a little over 21 square feet in one piece. Contractors like it because it goes up fast and paints up nicely. The top of the siding is thin, and the bottom is a half lap joint to allow for overlap and to still lay flat against the homes exterior sheathing. From the street, the look is intended to mimic a true lap siding. There have been several makers of this type of siding and several have discontinued their manufacturing of this line of products. In addition to Weyerhaeuser, Masonite, Georgia Pacific, and ABTCO are three that come to mind.
The Top 3 causes of damage include:
1) The backside of this half lap does not get primed and the painter cannot coat it once it's installed (making is susceptible to water damage)
2) People plant grass right up to their foundation stem wall and install inground sprinklers up against the house. When the sprinklers are on, the water is atomized, and a slight breeze can direct the water underneath the lap to the exposed siding. As you can imagine, pressed wood swells, delaminates, and disintegrates when exposed to moisture on an area that has not been properly protected with primer and paint.
3) We mentioned the grass right? Well, with grass comes damage from lawn mower wheels and weed whacker string.
In most cases the only factory primer on this siding is on the front. Rarely, will you see a proper installation where all the manufacturer’s instructions are followed especially the first course that meets the foundation stem wall.
The often ignored installations call for the half lap portion to be removed prior to installation.
Here is where things go south due to a combination of factors.
This thin portion overhangs the wall sheathing leaving it unsupported and the fact that it is maybe 3/16 “ thick makes is susceptible to breakage by lawn mower wheels or even a ground ball hit by the kids. Upon initial installation the bottom ¾” should have been removed (see pic to right and circle). When this doesn't occur (and it seldom does) it creates a perfect storm that is sure to wreak havoc with the siding.
Water runoff from an un-guttered roof eave or a lawn sprinkler too close to the foundation can allow atomized water drops to be swept up by the wind and contact the unprimed/unpainted portion of the siding. With this water exposure the siding’s fate is sealed.
A couple tips to avoid the issue:
1. Install rain gutters on all horizontal eaves on your home. Place extensions on your down spouts or use splash blocks to keep water away from your foundation.
- Watch the grade in your yard. The soil around the foundation has been excavated then backfilled after the stem wall went in. This backfill is often not mechanically compacted so overtime the soil settles and slopes back toward the foundation allowing water to pool against the foundation.
- Establish a dry bed measuring 16" to 24" from the foundation and relocate your sprinklers to that location as well. For the dry bed use inorganic matter, such as rock or recycled rubber mulch as it attracts fewer pests.
At JB’s home we needed to replace the bottom course of siding and even some of the 1x4’s that act as a batten covering the seams. You may notice that some of the scenes deciding is not butted tight to the next piece this is actually the proper way to install it as these 16-foot-long pieces do expand in contract with temperature and humidity swings. Several manufacturers have told me that they like the environment at the high desert of the intermountain West brings because of the lack of humidity this sighting certainly has more issues in areas like Seattle or in the Southeast where humidity levels are higher.
With this siding paint preparation is also critical. Any nails that are overdriven that break the surface of the siding with their head leaving an over sunk nail needs to be caulked. The trim will have exposed seams where a vertical one by four meets the one by two Frieze board at the soffit and wear a one by six or one by 8 piece of trim is used, and the fascia is butted together these scenes also need to be treated with a good quality caulking have.
The tools we needed for this job are as follows:
A skillsaw, a speed square, an air compressor, hose, pneumatic nail gun with full roundhead (As opposed to clip head) galvanized nails no larger than 8D in length. Specific siding nails come in 7D galvanized and are ring shanked. A flat prybar, a claw nail puller, a smooth faced hammer, and a chalk line.
I've included some pictures in this post so you could see the work in action.
If you lack basic carpentry skills and do not own the tools, you would be best served by hiring this part out. To find quality tradespeople in your location, go talk to the lumberyards where these products are sold and ask for references. Hopefully this post it helps you avoid problems in the future and gives you an understanding of the work that needs to be done around your farm.


The tale of two septics
It was the best of times, it was the worst of times…. That's how quickly it happens. The first sign of a backed up sewer septic system usually comes in the form of a scream from the shower indicating that the waters is not draining. The backup is caused by the water level reaching the same height as the inlet baffle of your septic tank. The immediate fix to this is to remove the Lid of your septic tank and insert a shovel handle down through the baffle to free any clog. At this point the septic tank needs to be pumped. Unfortunately this can happen day or night and often on weekends when emergency services are the most expensive. Nothing will make you become more acutely aware of your family's water usage then I full septic tank.
Once the septic tank has been pumped you have between a week to two before it fills up again depending on tank side and water usage and the size of the tank.
The diagnosis for this problem was that the drain field was not taking water.
With a freshly pumped tank and a little bit of breathing room the research commenced.
With the possibility of a new drain field and what at the time was an unknown expense I was looking for options.
A little background as your situation and septic system type may be different. As the original owners of the home I know I have a perforated pipe and gravel septic system. We have added onto it once when we didn't addition on our home. And I had the map of the location and diagram from the local health department that regulates septic systems.
I started to hear words like bioremediation associated with between $800 and $1500 price tags. My thought on this was if not successful that $800-$1500 fix what I've gone a long way to paying for a new drain field. One of my neighbors had received a quote for a new drain field that was $20,000. They had finally found a contractor to do it for $5000.
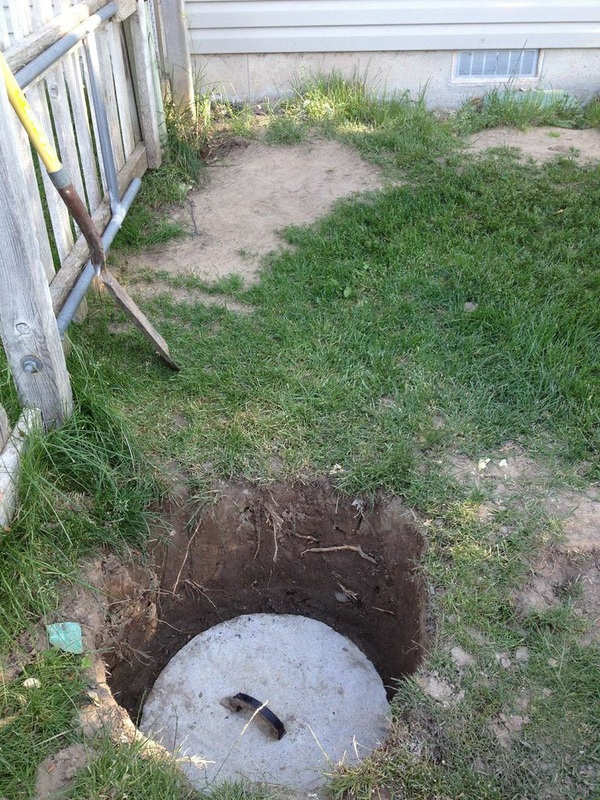
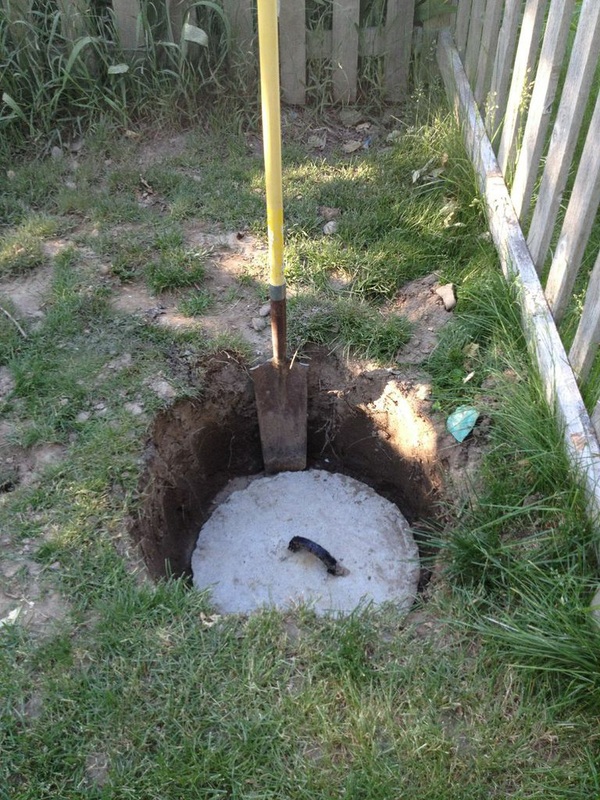
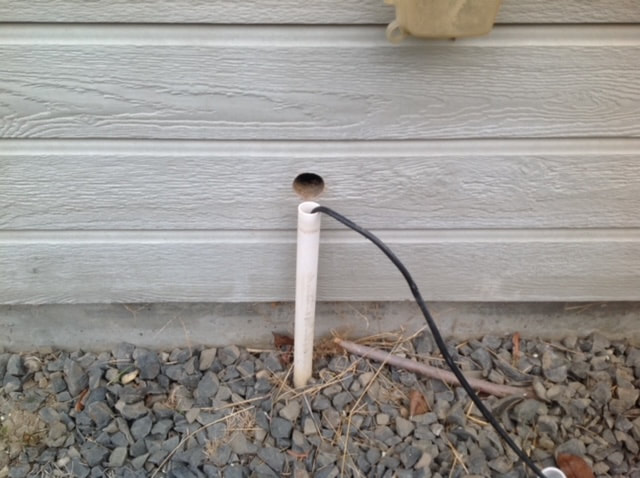
By this point I had installed to access points to my septic tank. One was the 24 inch round pipe with the green lid where you access the main lid to your septic tank. This is placed directly over the inlet baffle coming from the home. The other is an 8 in.² that is directly over the outlet baffle to the drain field. The second access point came in handy when determining if the drain field was taking water.
After calling several septic service companies and asking what they would do and doing and less hours of online research, I decided to try my own version of bio remediation.
This included a drain Jetter rented from the local tool rental store and a 40 pound bag of sodium hydroxide a.k.a. caustic soda or lye. With an empty tank I fed a garden hose into the drain field line to pressurize the drain field. I turn the water off and remove the hose and watch the water drain back into the tank. The idea was to flush out any solids that may have gotten into the drain field. Then I attached the drain jetter to the garden hose and started the electric pump motor. Began to feed the hundred foot hose through the baffle and into the drain field using the second access point I had made. I was able to fish the hose pass the T, another 90° angle and down each leg of the drain field.
I repeated this process about a dozen times. The Jets on the tip help to feed the hose down the drain pipe and work to flush any solids out as you remove it slowly.
Once I had satisfactorily jetted the drain field I mixed the caustic soda and water and poured directly into the drain field via a final and clear plastic hose.
Keeping in mind that water and caustic soda give off heat and the caustic soda should not come in contact with your skin.
The thought process is that this mixture will break down any solids in the drain field. For this reason you do not want her in your tank as it can break down solids and have more of them float into your drain field and clog it.
With the drain field resting in the caustic soda hopefully dissolving any solids that may be clogging up it was a waiting game.
Well a week later as the tank filled to the level of the outflow baffle we could see a small stream of water steadily flowing into the drain field. Eureka we shouted! Success!
A $100 drain jetter rental and a $40 caustic soda purchase and we were back in business! So much better than the 800 to $1500 we were quoted.
Well, not so fast!
One more week later and we are back at square one with a full tank.....ARRRGGGGHHH!
So I call an excavator who had done work for us in the past and got a ballpark of $3500 to $4500 for a new drain field. Unsure how this process would go, I called the Health department and bought a permit for a failed system replacement. This was about half price from a new system permit. They must be having pity on someone having to replace the septic system. My assumption was we would have to dig up the pipe and abandon the old system. Much to my surprise they installed a bypass valve between the tank and the tee that went out to my drain field. This valve was put in place using rubber couplers and hose clamps. The great thing about this is that I use my new drain field for three or five years and I can switch that bypass and send water to the old field. The inspector says that the old field can actually recover after being rested for two years.
The best thing about this whole project is when it was over! Luckily for us, we got the system installed about one day before the first big snowstorm of 2014/15 winter. In conversations with the builder friend, you let me know that the new permits make your account for the proposed system location and a replacement system location.
It is important to note that there are several types of septic drain field configurations. The specific type of system discussed above was a perforated pipe drain system. Other system types include a domes system which is prone to failure and a mound system. Other types of septic system rejuvenation schemes include forcing compressed air into the earth to create an impressive explosion that breaks up the soil to allow it to take on moisture again. The thought process behind this is that the salt from various detergents combined with your soil to create calcite also known as hard Pam that creates an in permeable layer and leads to septic drain field failure.
Once the septic tank has been pumped you have between a week to two before it fills up again depending on tank side and water usage and the size of the tank.
The diagnosis for this problem was that the drain field was not taking water.
With a freshly pumped tank and a little bit of breathing room the research commenced.
With the possibility of a new drain field and what at the time was an unknown expense I was looking for options.
A little background as your situation and septic system type may be different. As the original owners of the home I know I have a perforated pipe and gravel septic system. We have added onto it once when we didn't addition on our home. And I had the map of the location and diagram from the local health department that regulates septic systems.
I started to hear words like bioremediation associated with between $800 and $1500 price tags. My thought on this was if not successful that $800-$1500 fix what I've gone a long way to paying for a new drain field. One of my neighbors had received a quote for a new drain field that was $20,000. They had finally found a contractor to do it for $5000.
By this point I had installed to access points to my septic tank. One was the 24 inch round pipe with the green lid where you access the main lid to your septic tank. This is placed directly over the inlet baffle coming from the home. The other is an 8 in.² that is directly over the outlet baffle to the drain field. The second access point came in handy when determining if the drain field was taking water.
After calling several septic service companies and asking what they would do and doing and less hours of online research, I decided to try my own version of bio remediation.
This included a drain Jetter rented from the local tool rental store and a 40 pound bag of sodium hydroxide a.k.a. caustic soda or lye. With an empty tank I fed a garden hose into the drain field line to pressurize the drain field. I turn the water off and remove the hose and watch the water drain back into the tank. The idea was to flush out any solids that may have gotten into the drain field. Then I attached the drain jetter to the garden hose and started the electric pump motor. Began to feed the hundred foot hose through the baffle and into the drain field using the second access point I had made. I was able to fish the hose pass the T, another 90° angle and down each leg of the drain field.
I repeated this process about a dozen times. The Jets on the tip help to feed the hose down the drain pipe and work to flush any solids out as you remove it slowly.
Once I had satisfactorily jetted the drain field I mixed the caustic soda and water and poured directly into the drain field via a final and clear plastic hose.
Keeping in mind that water and caustic soda give off heat and the caustic soda should not come in contact with your skin.
The thought process is that this mixture will break down any solids in the drain field. For this reason you do not want her in your tank as it can break down solids and have more of them float into your drain field and clog it.
With the drain field resting in the caustic soda hopefully dissolving any solids that may be clogging up it was a waiting game.
Well a week later as the tank filled to the level of the outflow baffle we could see a small stream of water steadily flowing into the drain field. Eureka we shouted! Success!
A $100 drain jetter rental and a $40 caustic soda purchase and we were back in business! So much better than the 800 to $1500 we were quoted.
Well, not so fast!
One more week later and we are back at square one with a full tank.....ARRRGGGGHHH!
So I call an excavator who had done work for us in the past and got a ballpark of $3500 to $4500 for a new drain field. Unsure how this process would go, I called the Health department and bought a permit for a failed system replacement. This was about half price from a new system permit. They must be having pity on someone having to replace the septic system. My assumption was we would have to dig up the pipe and abandon the old system. Much to my surprise they installed a bypass valve between the tank and the tee that went out to my drain field. This valve was put in place using rubber couplers and hose clamps. The great thing about this is that I use my new drain field for three or five years and I can switch that bypass and send water to the old field. The inspector says that the old field can actually recover after being rested for two years.
The best thing about this whole project is when it was over! Luckily for us, we got the system installed about one day before the first big snowstorm of 2014/15 winter. In conversations with the builder friend, you let me know that the new permits make your account for the proposed system location and a replacement system location.
It is important to note that there are several types of septic drain field configurations. The specific type of system discussed above was a perforated pipe drain system. Other system types include a domes system which is prone to failure and a mound system. Other types of septic system rejuvenation schemes include forcing compressed air into the earth to create an impressive explosion that breaks up the soil to allow it to take on moisture again. The thought process behind this is that the salt from various detergents combined with your soil to create calcite also known as hard Pam that creates an in permeable layer and leads to septic drain field failure.
Other pics from around the house: |
|